Virtual and Augmented Reality together are now referred to as XR or “Extended-Reality”.
You’re in the right place at the right time to build something amazing in XR!
XR applications can be created in Unity for many devices, our focus will be on Microsoft Hololens 2 and the Meta Quest
In this blog post series we will focus on Meta Quest!
Check out other blog articles in this (and other) series!
Quick links to Lance’s latest XR Step-by-Step blog articles by device
We now have everything setup to start building our XR experience! If not, see the previous blog article in this series. Now let’s add tracked controllers so we can interact with everything we want to build
Full Step-by-Step Instructions!
Goals…
- Modify Project (Optional)
- Setup Controllers
- Customize Controllers

Download the finished code for this blog article @ Github Repo
Modify Project (Optional)
- This is optional for you, you can continue to modify the same scene we started earlier.
- But in the Github Repo – I wanted to separate each blog post into it’s own labeled scene.
- Here’s how to copy a scene, rename it and change which scene you are running.
- Note, for the future – this is a good way to try something, and if it doesn’t work – you can delete the copied scene – and generally go back to your previous scene setup and try something different… 🙂
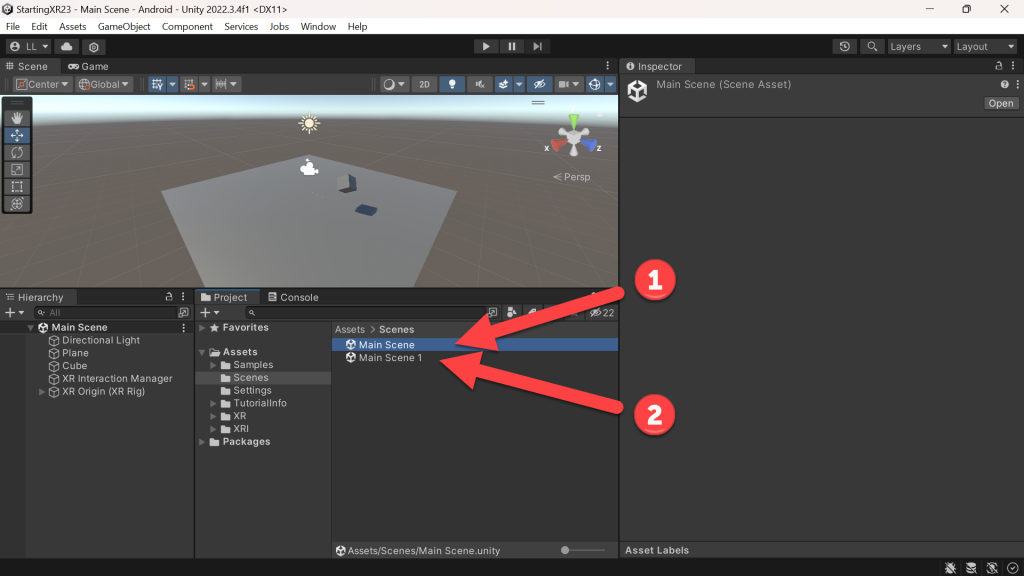
- Click Main Scene -> Press CTRL-C -> Press CTRL-V
- Click Main Scene 1 -> Press F2 to rename -> Change to Scene 1 – Spinning Cube
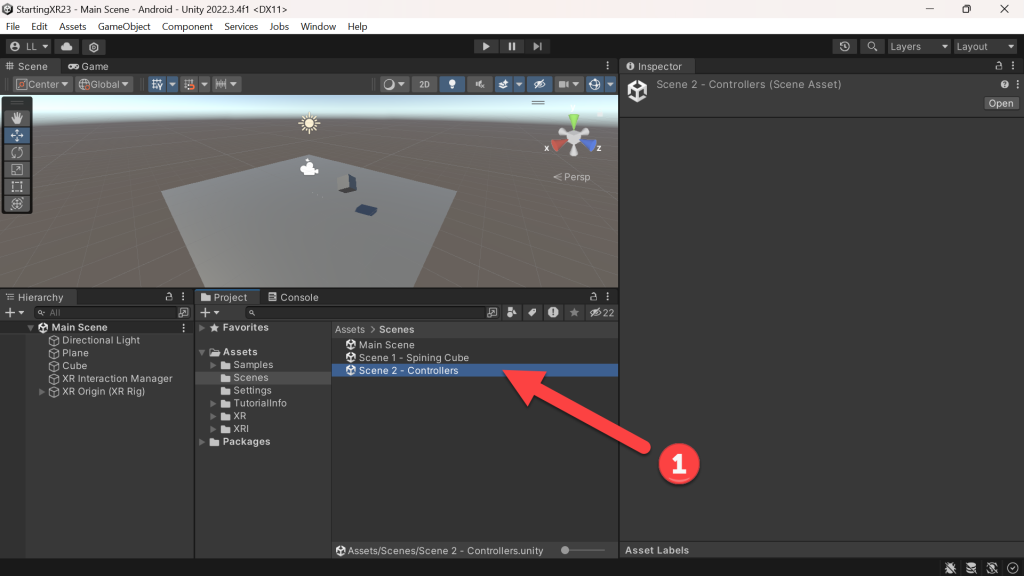
- Do the steps above again and create a new scene -> Scene 2 – Controllers
- Double-Click Scene 2 – Controllers -> Hierarchy should now show Scene 2 – Controllers
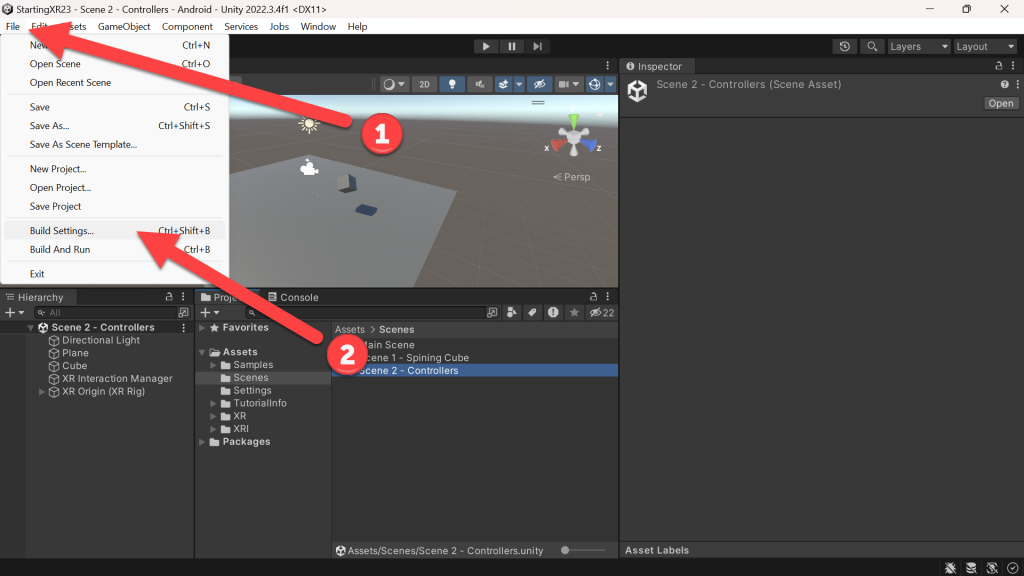
- (Toolbar) Click File -> Click Build Settings
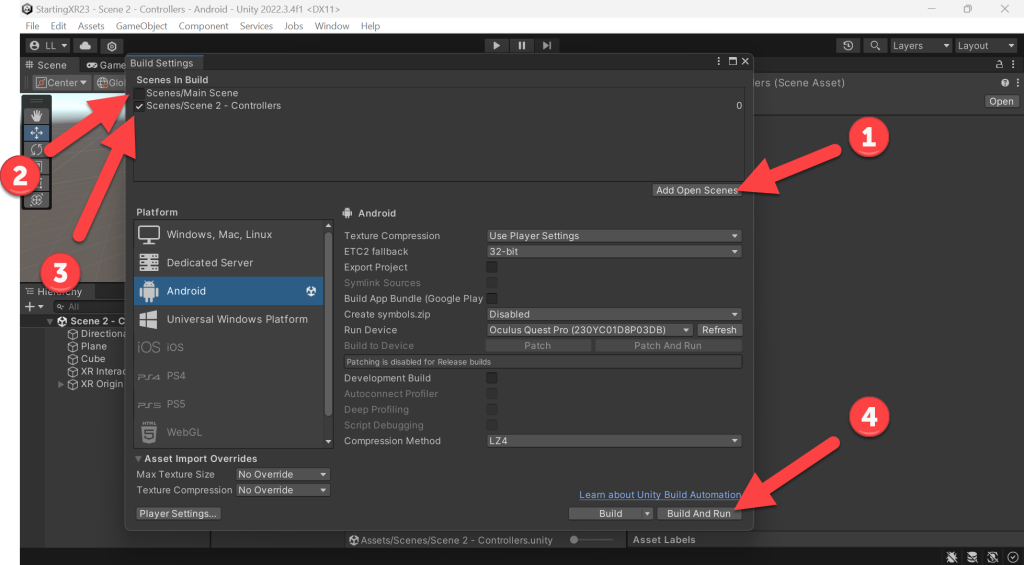
- (Build Settings) Click Add Open Scenes
- Uncheck Scenes/Main Scene
- Check Scenes/Scene 2 – Controllers
- Now when you click Build And Run you will see the new scene!
Setup Controllers
- So we’ll see that when we added the XR Origin (VR) previously, that it had Left Controller and Right Controller child objects – but nothing showed up when we previously ran the project.
- Note, if you try the steps below and DO NOT see the Select Preset values – go back to the previous article and make sure that when you added the XR Interaction Toolkit that you also installed the Samples. If you didn’t, you can easily add the Samples now.
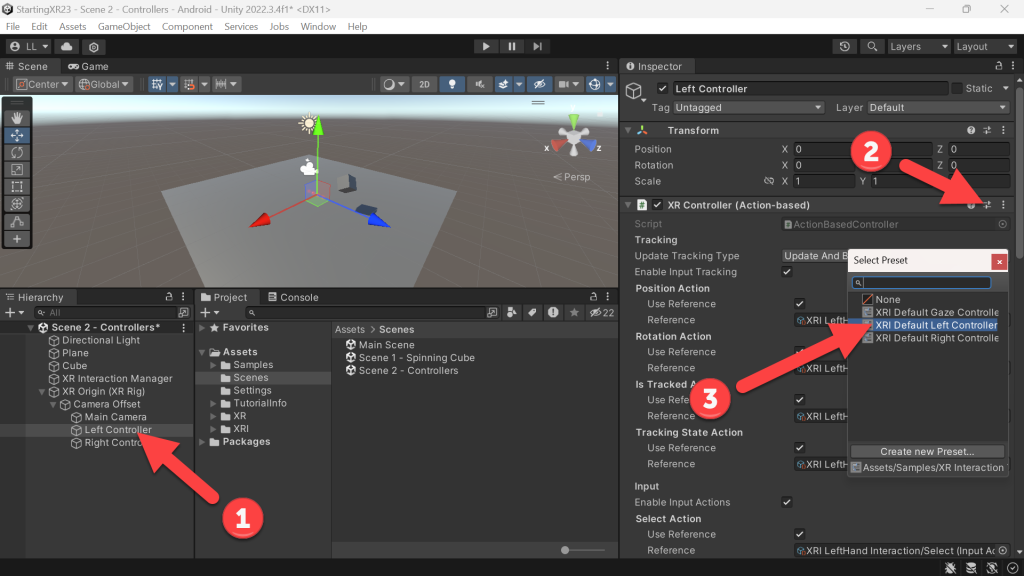
- (Hierarchy) Expand the XR Origin (XR Rig) -> Click Left Controller
- (Inspector) XR Controller (Action-based) -> Click the Select Preset icon (looks like two sliders)
- (Select Preset) Click XR Default Left Controller
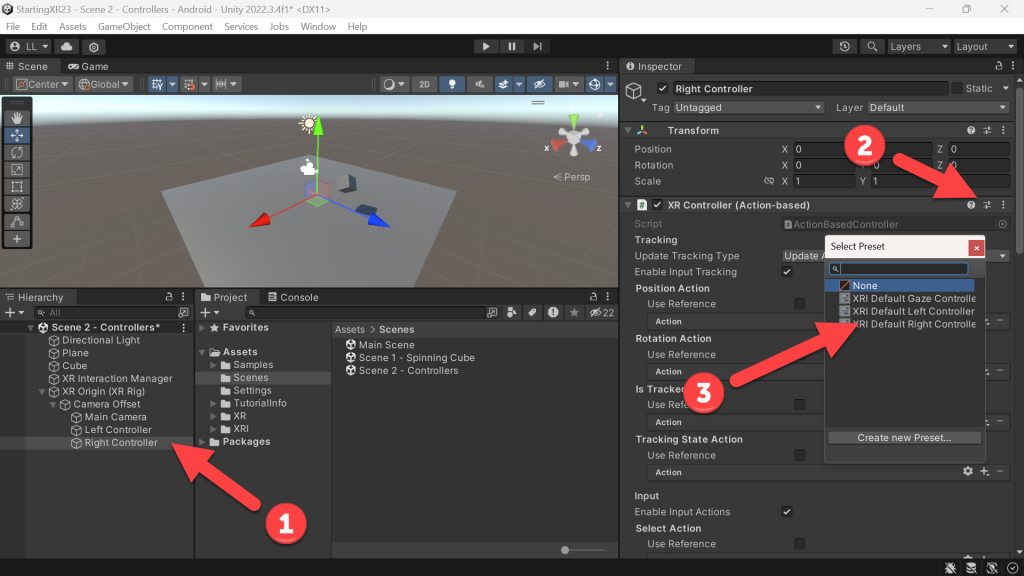
- (Hierarchy) Expand the XR Origin (XR Rig) -> Click Right Controller
- (Inspector) XR Controller (Action-based) -> Click the Select Preset icon (looks like two sliders)
- (Select Preset) Click XR Default Right Controller
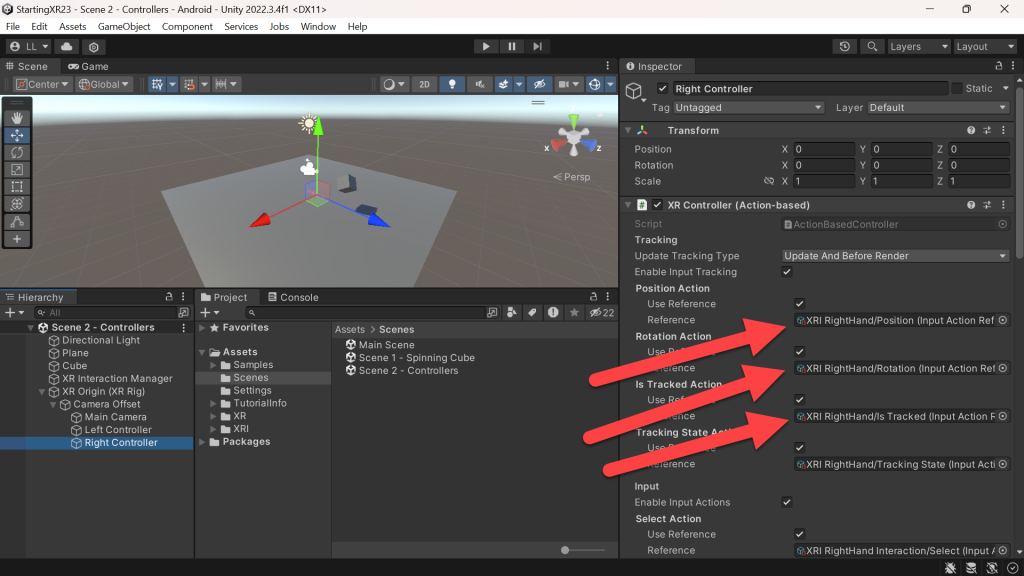
- You should see that by clicking on those presets that we have auto filled in a LOT of values! These presets are amazingly helpful.
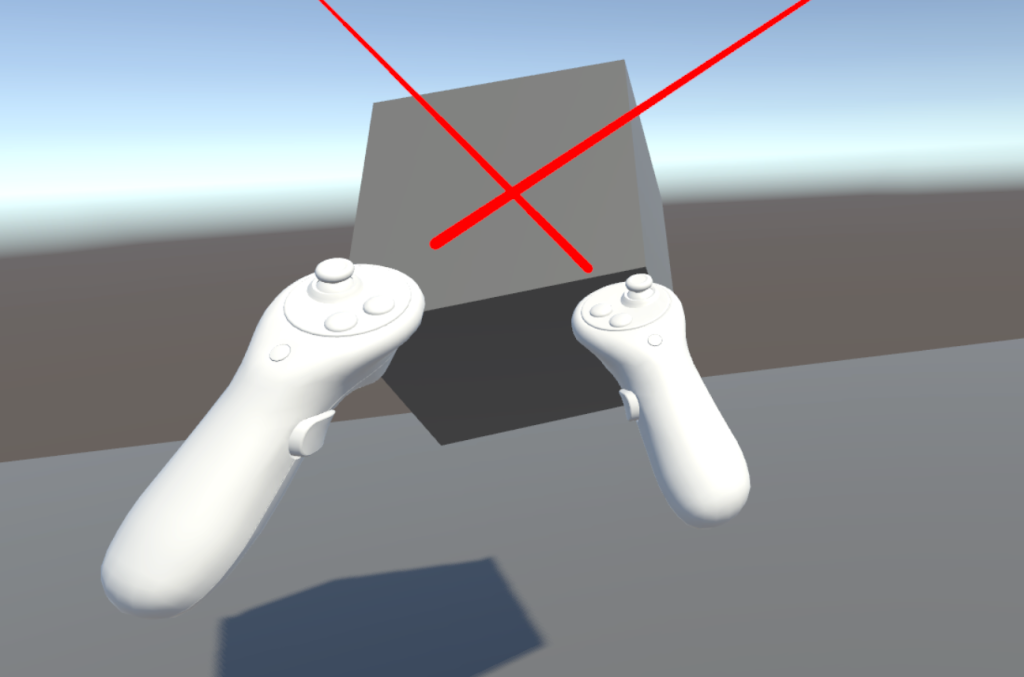
- Build and Run your project… and we’re DONE!
- Wow was that a lot quicker than the previous article. :p
- If you’ve setup controllers in XR projects prior to the recent version XR Interaction Toolkit – this was a lot more work… Welcome to 2023 – controllers take just a couple clicks to setup.
Customize Controllers
- If like me, you’re not crazy about the white controllers however – where do you go to change the way they look?
- (Hierarchy) Click Left Controller
- (Inspector) Click Model Prefab
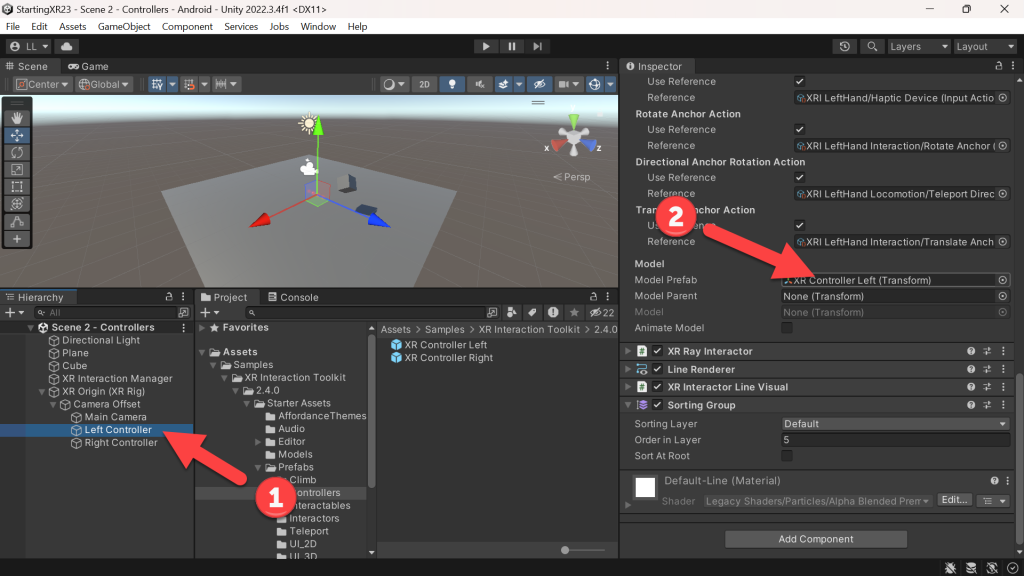
- So this may be the first time you’ve seen a Prefab. Whether it is or not, a Prefab in Unity is a reusable game object that you can create, configure, and store in your project for later use. Prefabs can include any number of components and child objects, which makes them incredibly flexible for a variety of situations.
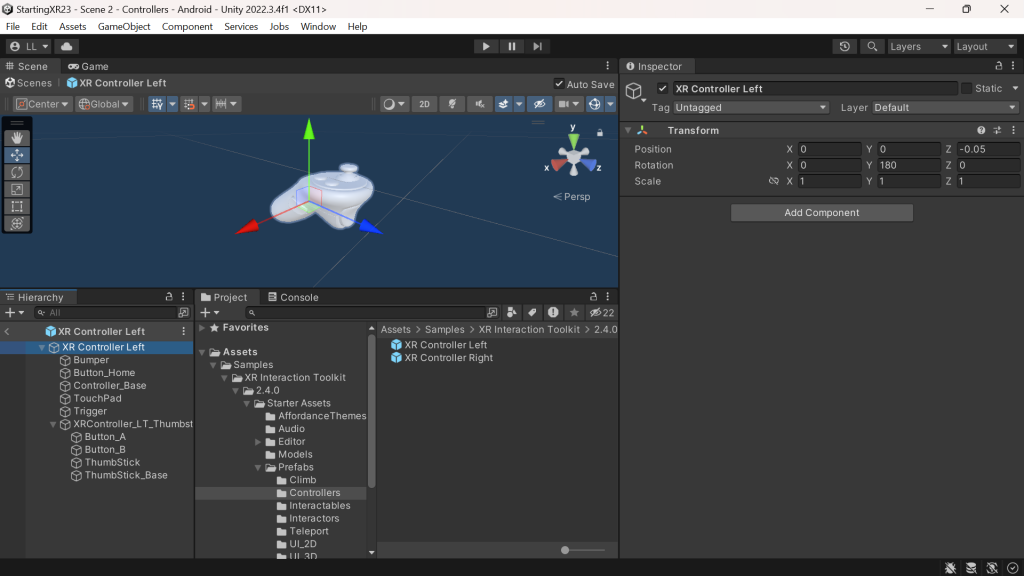
- In this case we have a left controller prefab that has buttons, the main controller body and several others – click on them in the Hierarchy menu and the corresponding part has focus in the Scenes Window.
- Let’s change some of the parts to other colors — I’m going with Black for a couple pieces, but you should feel free to color them however you want!
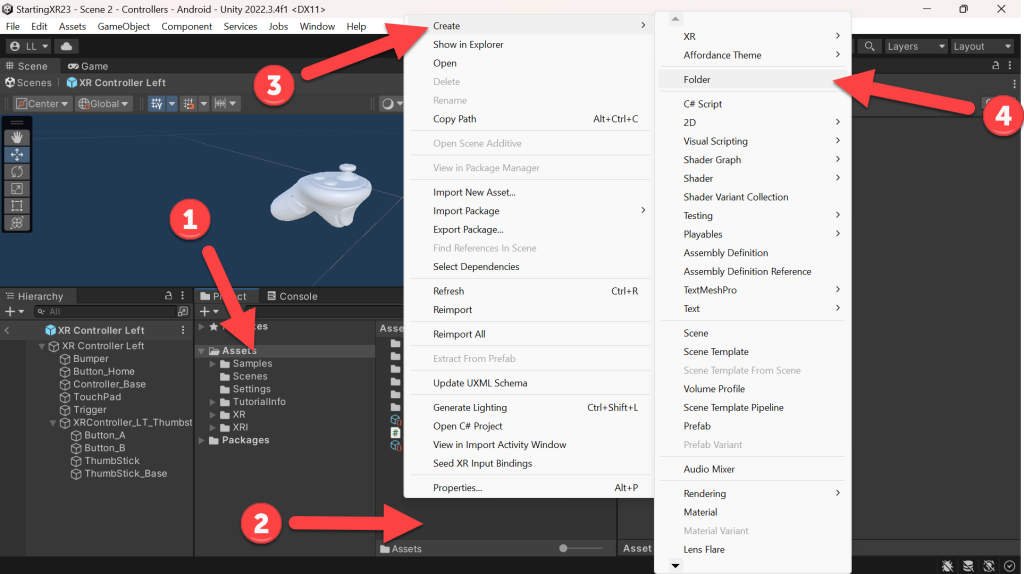
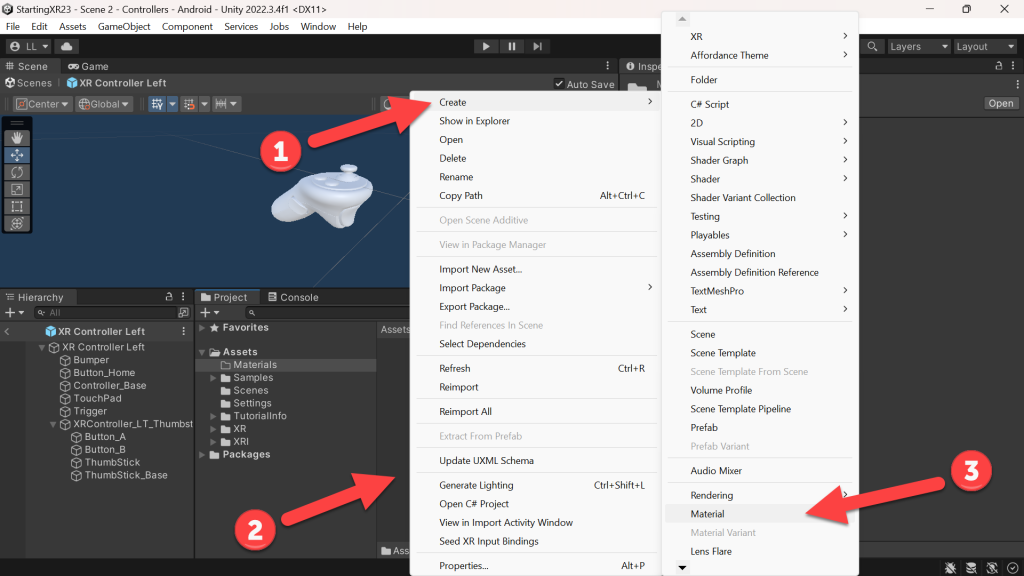
- (Project) Click Assets
- (Project Details) Right-Click
- Click Create
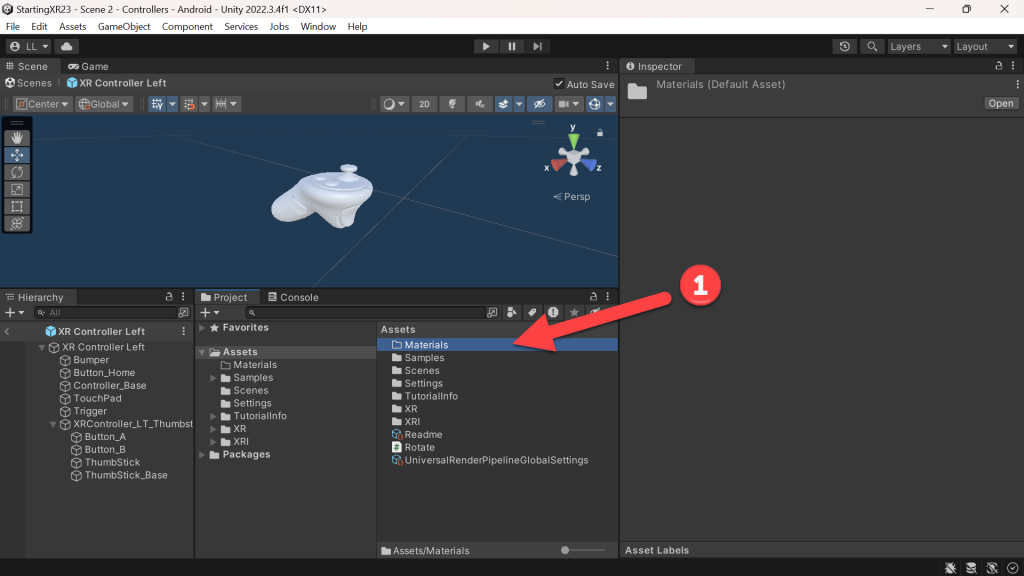
- Click Folder -> Name it Materials
- (Project Details) Click Materials
- (Project Details) Right-Click
- Click Create
- Click Material -> Name it Black
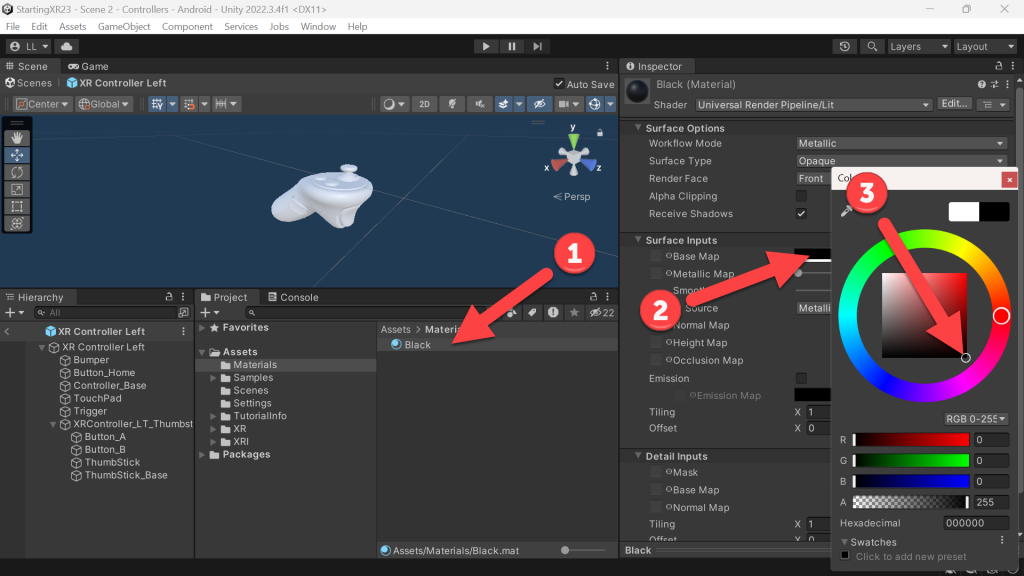
- (Project Details) Click Black
- (Hierarchy) Under Surface Inputs -> Click Base Map
- (Color) Click on the color square, selecting the black color
- (Project Details) Drag the Black material on to the Controller_Base of the controller prefab
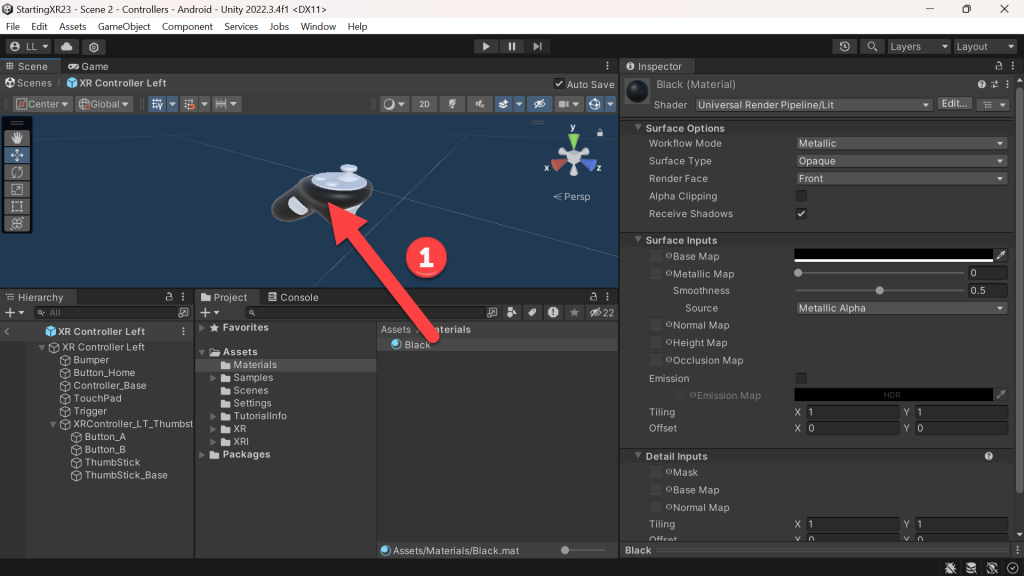
- (Project Details) Drag the Black material on to the TouchPad of the controller prefab

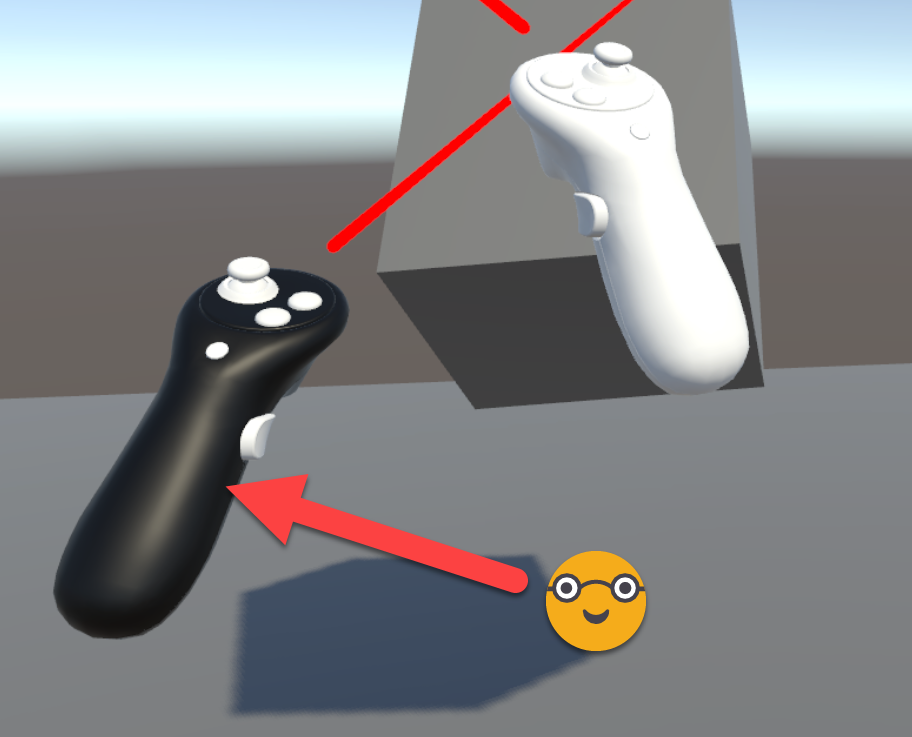
- Build and Run!
- Look at that, looks better to me… 🙂 Again, feel free to color YOUR controller any way you’d like.
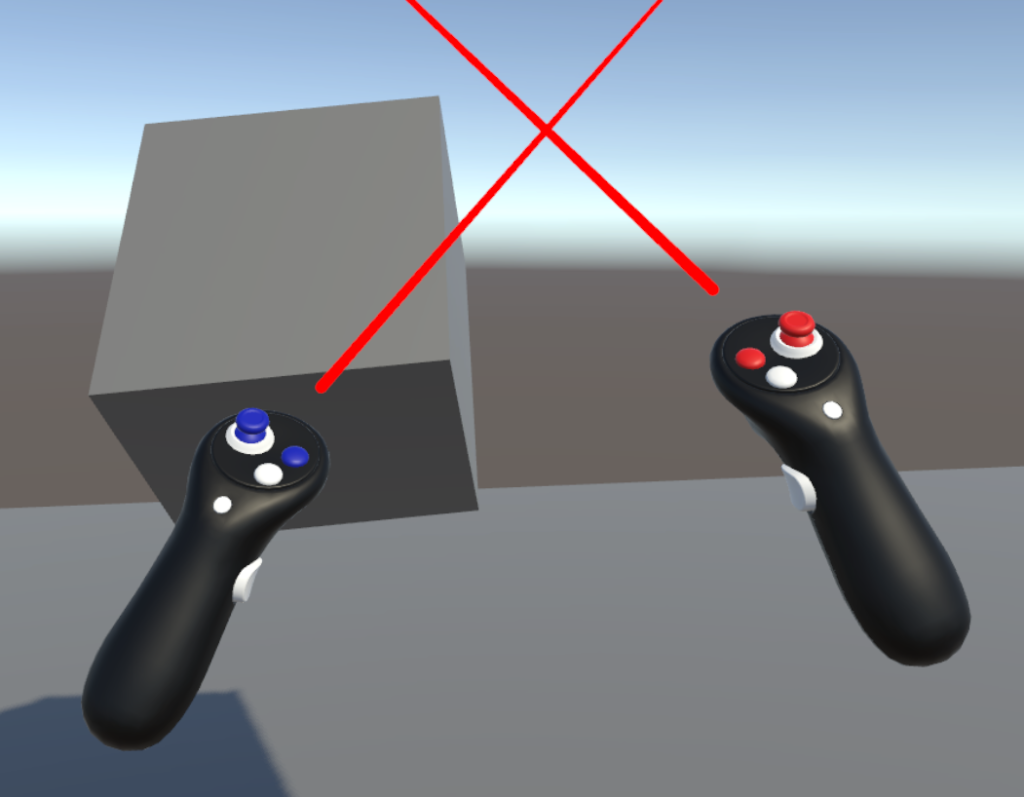
- Follow the same process for the Right controller, but use the same materials that you created for the Left controller.
- Here’s my final color scheme — added a Red and Blue material.
I always love feedback and suggestions for new XR / AI blog posts!
Go build something amazing in XR & AI! — Lance 🙂
Check out other blog articles in this (and other) series!
Quick links to Lance’s latest XR Step-by-Step blog articles by device


2 thoughts on “XR Step-by-Step 2023! Meta Quest: Adding Controllers! Unity 2022 + Open XR + XR Interaction Toolkit”