
Virtual and Augmented Reality together are now referred to as XR or “Extended-Reality”.
You’re in the right place at the right time to build something amazing in XR!
XR applications can be created in Unity for many devices, our focus will be on Microsoft Hololens 2 and the Meta Quest
In this blog post series we will focus on Meta Quest!
Check out other blog articles in this (and other) series!
Quick links to Lance’s latest XR Step-by-Step blog articles by device
We have the basics down for any XR experience. Now let’s move on to adding some game elements. We’ll start with making a pistol that we can shoot!
Full Step-by-Step Instructions!
Goals…
- Adding a Pistol
- Make the Pistol Interactable
- Shoot!

Download the finished code for this blog article @ Github Repo
Adding a Pistol
- We need to start by downloading a pistol game object that we can use in our scene – you can download the Pistol unity package here!
- Thank you to one of my favorite Youtubers for this easy to use asset – ValemTutorials
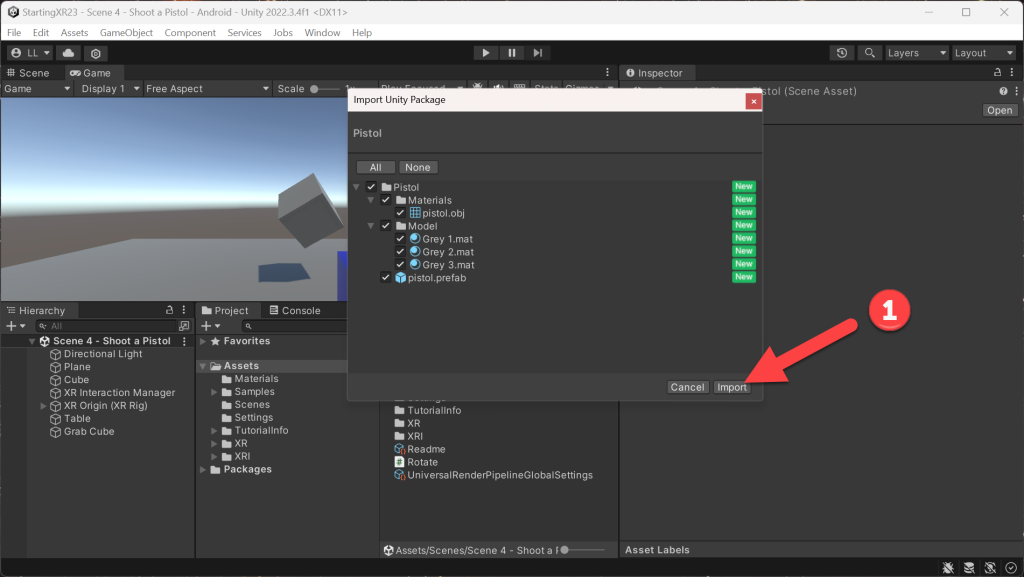
- (File Explorer) Drag the downloaded Pistol.unitypackage in the Project Assets folder

- (Import Unity Package) Click Import
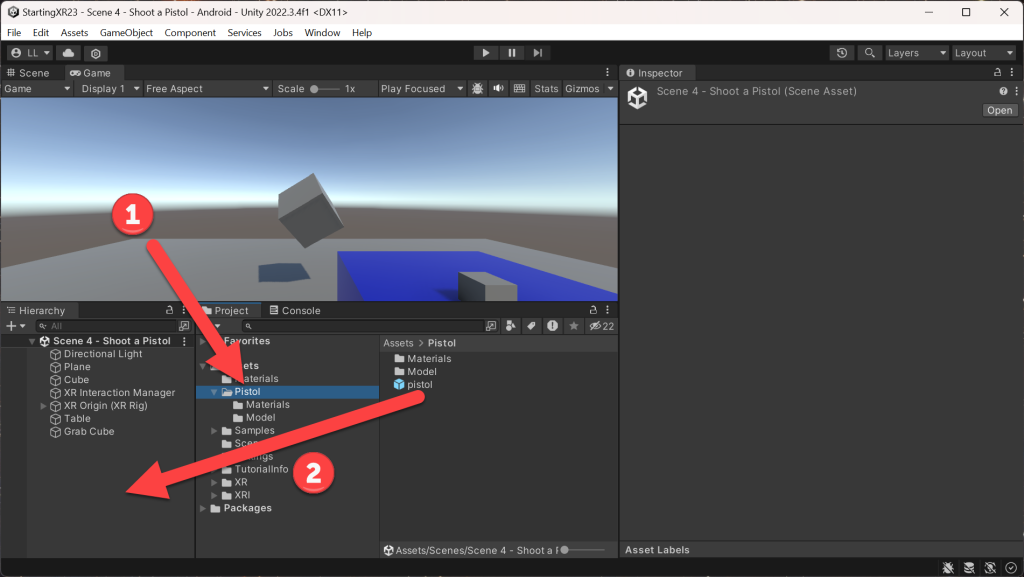
- (Project) Click on the new Pistol folder
- Drag pistol prefab into Hierarchy
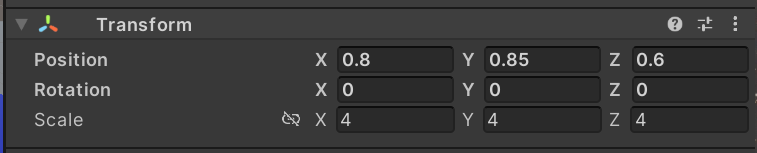
- (Hierarchy) Click pistol
- (Inspector) Change Transform values

Make the Pistol Interactable
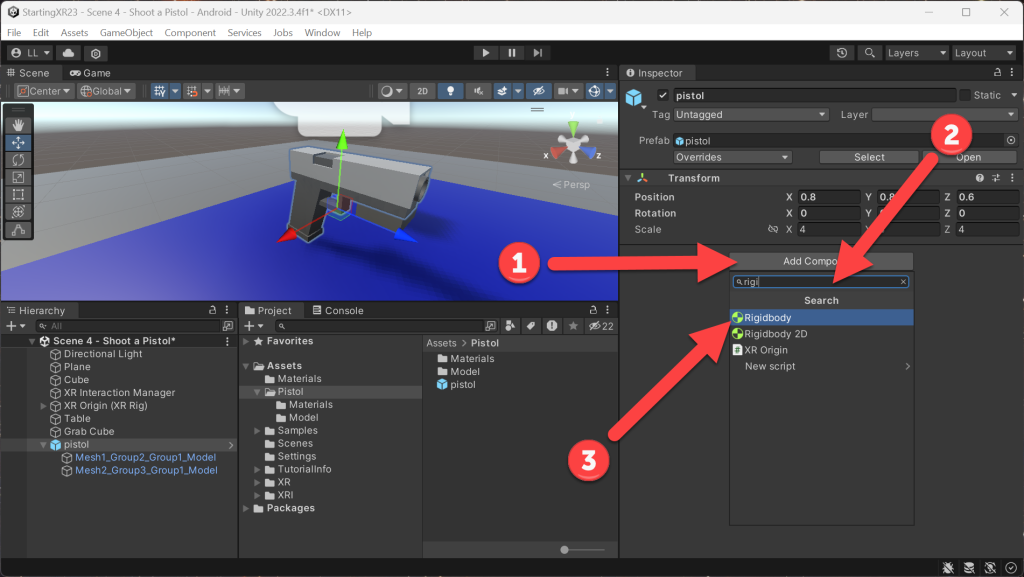
- Now that we have a pistol, we want to be able to pick it up just like we did with the XR Grab Interactable
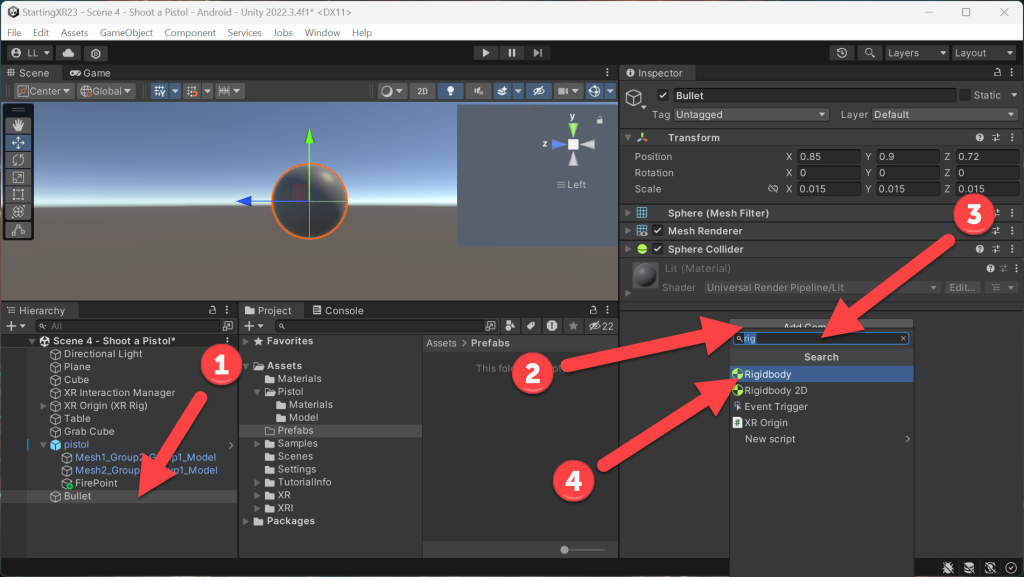
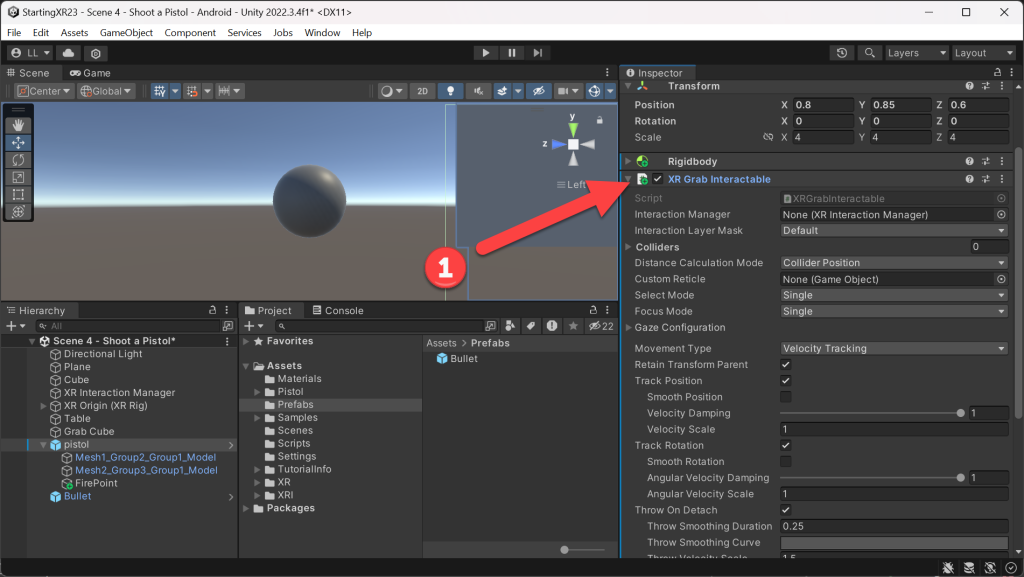
- (Inspector) Click Add Component
- (Inspector Search) Type rigid
- Click Rigidbody
- Giving an object a Rigidbody will make physics (such as gravity) effect the object
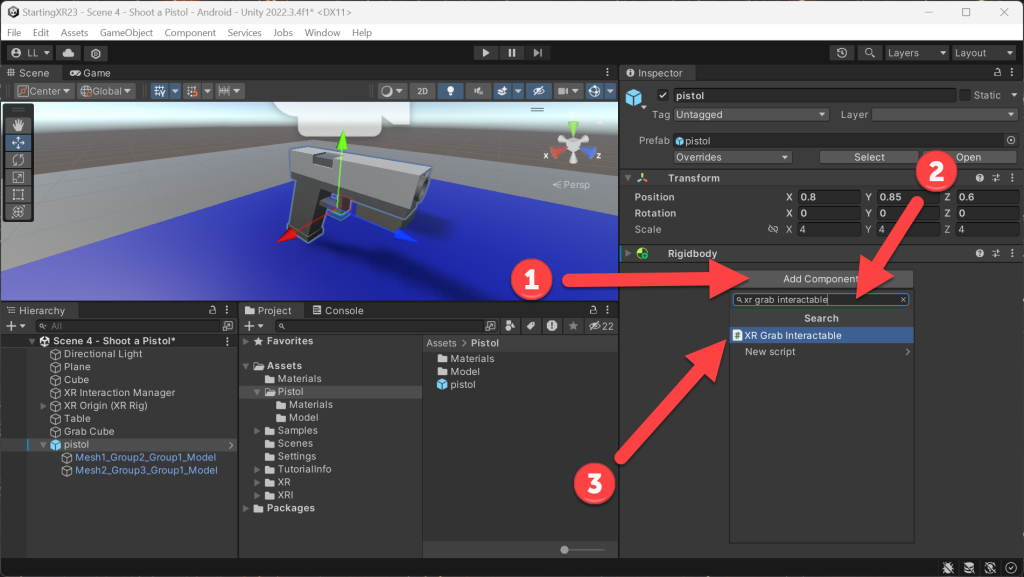
- (Inspector) Click Add Component
- (Add Component Search) Type xr grab interactable
- Click XR Grab Interactable
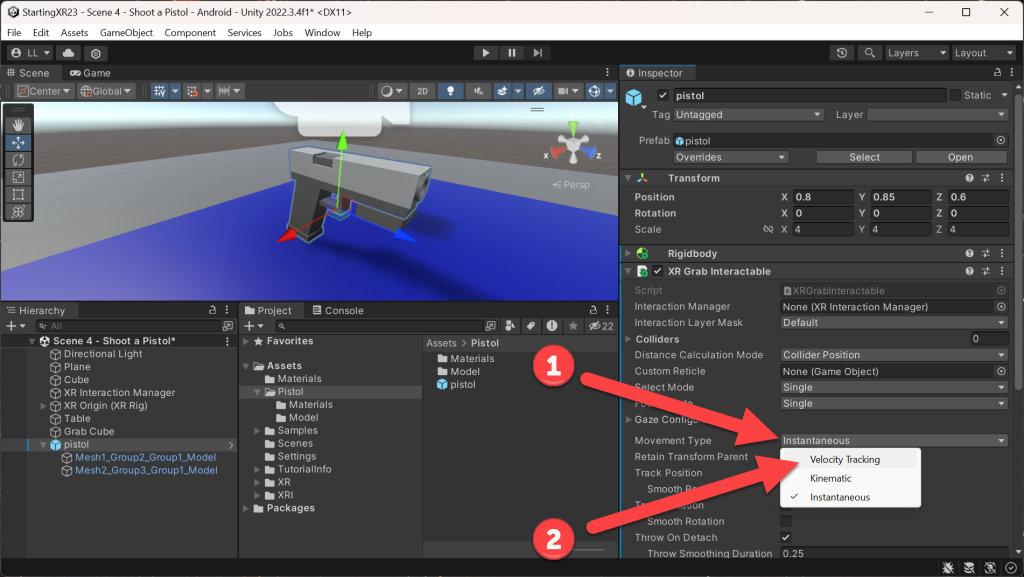
- (Inspector) Within XR Grab Interactable -> Click Movement Type
- Click Velocity Tracking
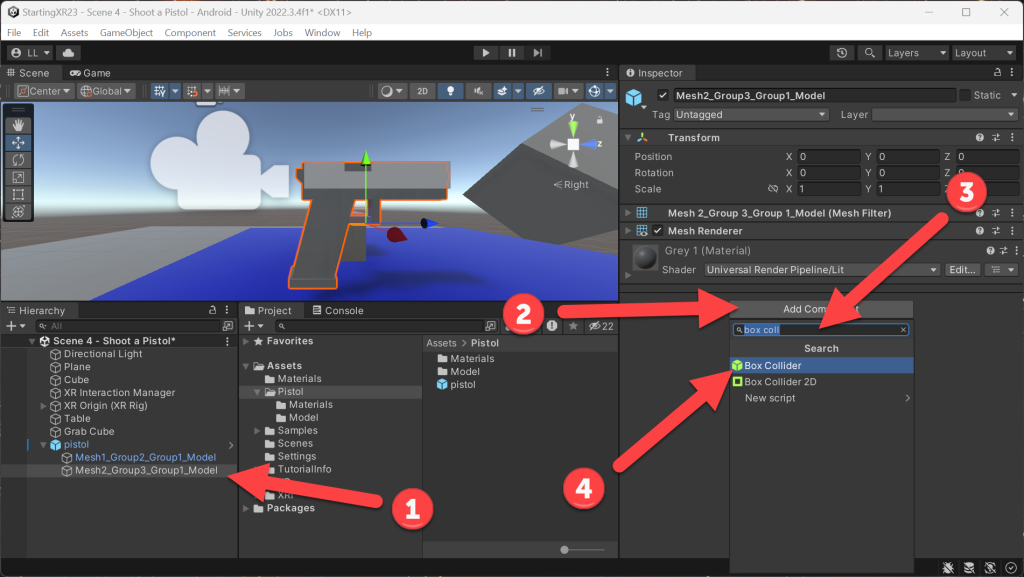
- One last thing, as the pistol prefab has several parts – we need to select the main body of the pistol which is called Mesh2_Group3_Group1_Model (obvious right?!?) – but even if the name is odd, it’s easy to see if you click between to child objects of the pistol
- We want to select this as we want to add a Box Collider – which sizes automatically if we select this.
- If we do NOT add a collider of some sort, since the pistol is a Rigidbody and under the effect of gravity, it will fall through our table, fall through our ground and keep falling forever :p
- (Hierarchy) Click Mesh2_Group3_Group1_Model
- (Inspector) Click Add Component
- (Add Component Search) Type box collider
- Click Box Collider
- Build and Run
- Look at that! We can grab the pistol… So note this process, as you can take most any object and do the same process to make anything grabbable 🙂

Shoot!
- Now we get to a little bit of easy coding, when we pull the trigger on the gun we want a bullet to fire – you’ll find out that this is pretty easy 🙂
- We’ll start by setting the point where the gun would fire from our FirePoint
- Then we’ll create a bullet object to actually fire
- Then we’ll code it so that when we pull the trigger, it fires!
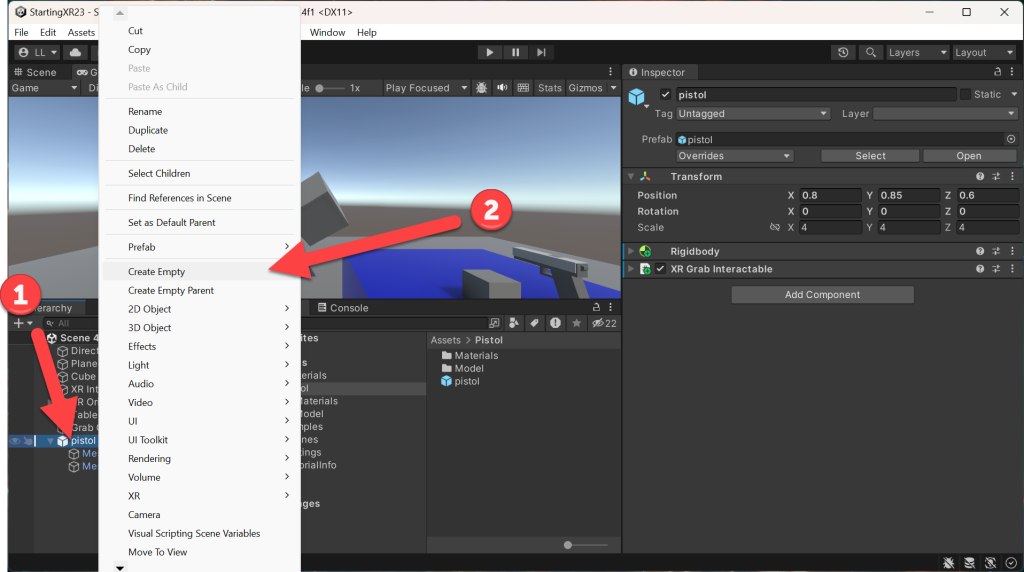
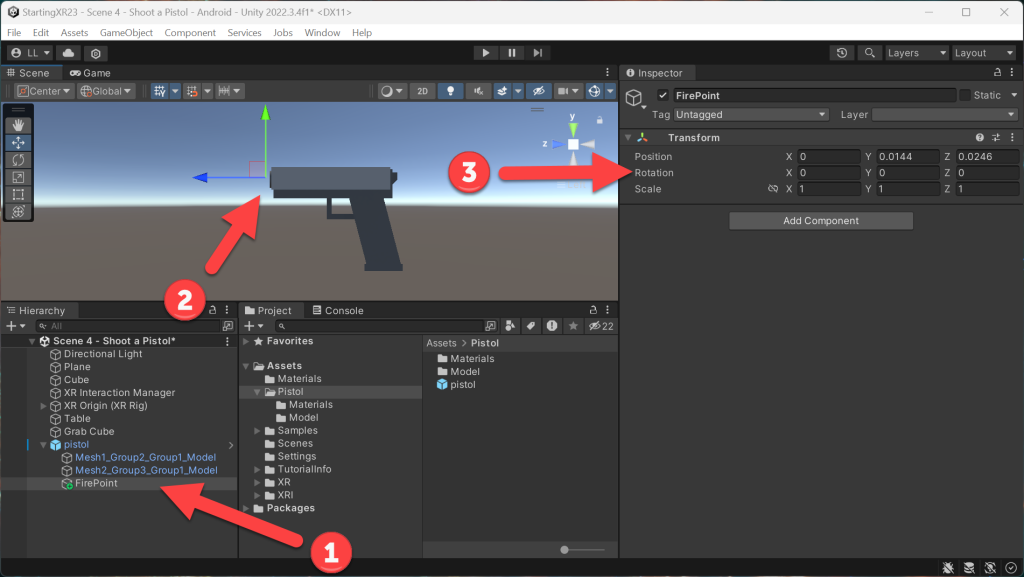
- (Hierarchy) Right-Click on pistol
- Click Create Empty -> Rename it FirePoint
- (Hierarchy) Click FirePoint
- Drag FirePoint to where you want the bullet to come out, so likely right in front of the barrel
- (Inspector) The Transform values I likes were as follows

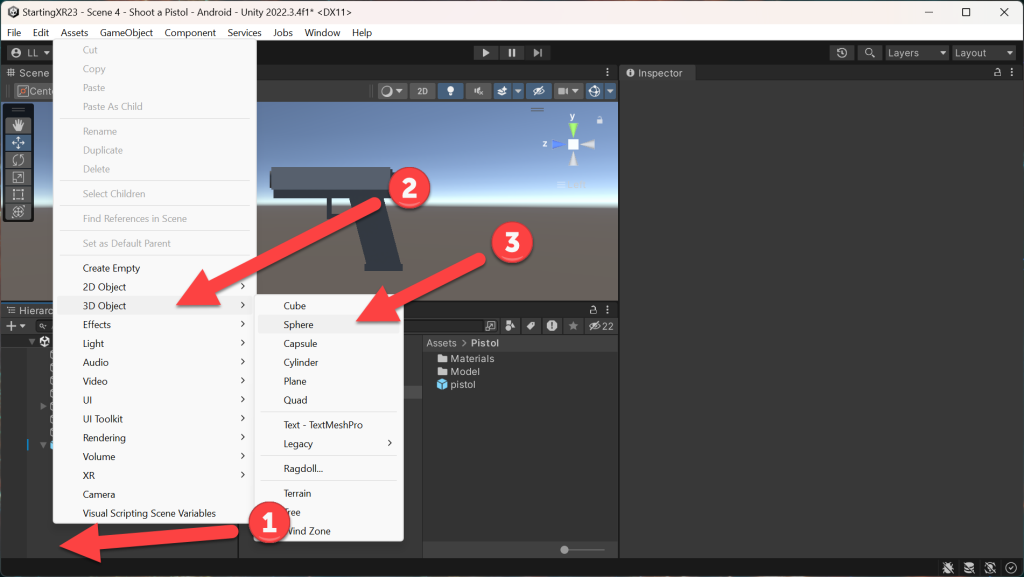
- Now let’s create the bullet
- (Hierarchy) Right-Click
- Click 3D Object
- Click Sphere -> Rename it Bullet
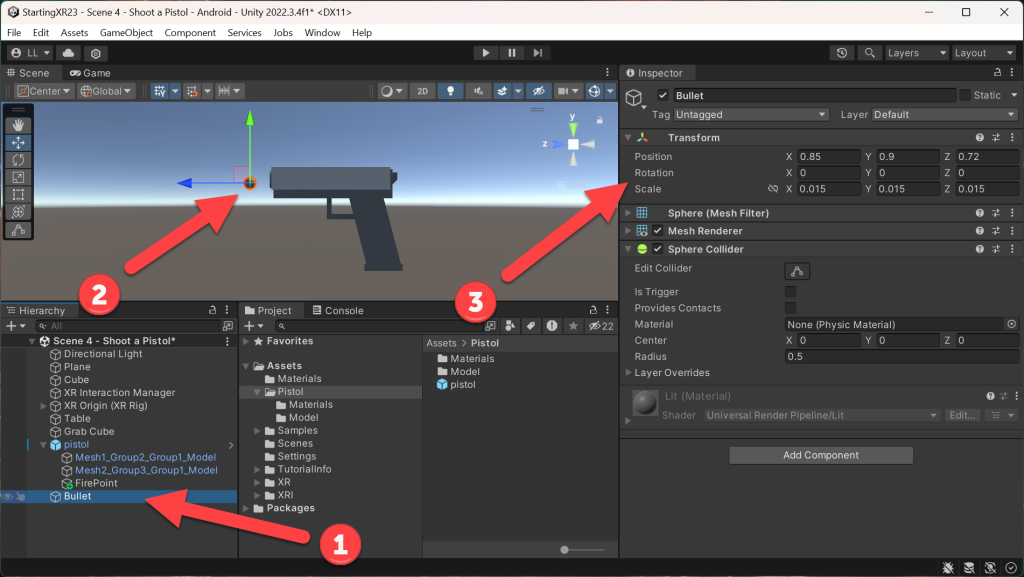
- (Hierarchy) Click Bullet
- Drag the Bullet close to the barrel of the gun so you can get the correct relative size
- (Inspector) The Transform values I likes were as follows

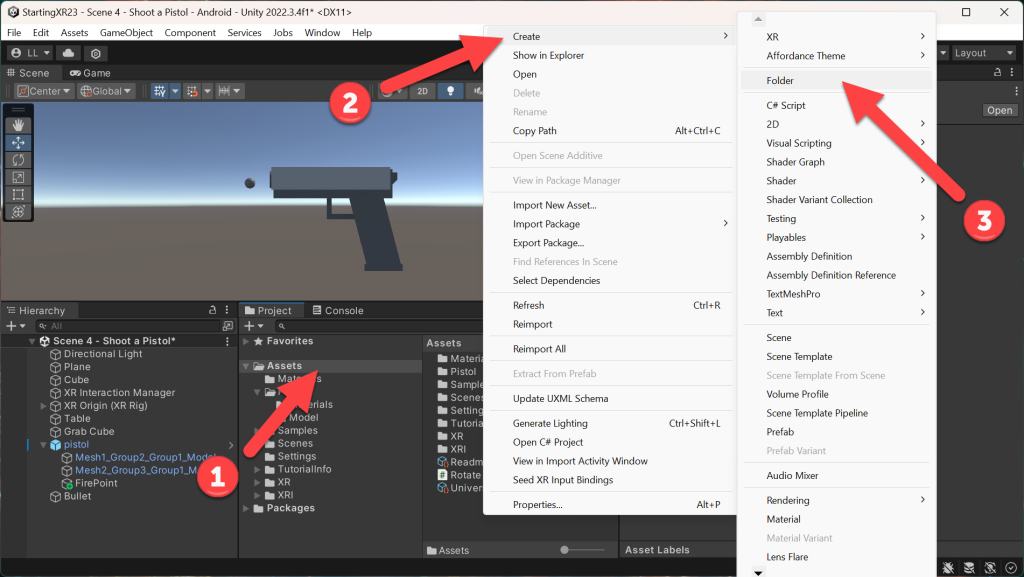
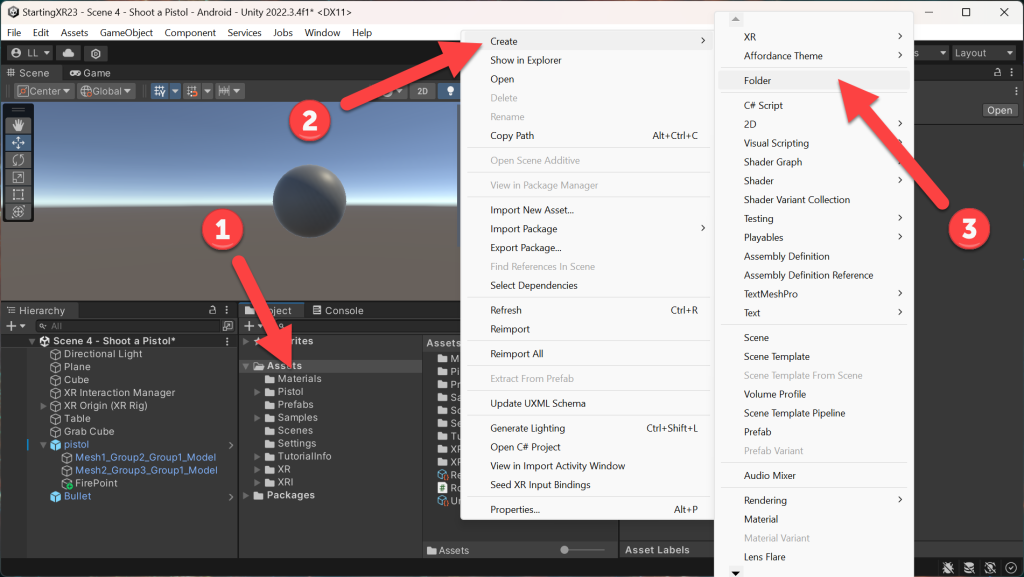
- (Project) Right-Click on Assets folder
- Click Create
- Click Folder -> Rename it Prefabs
- (Hierarchy) Click Bullet
- (Inspector) Click Add Component
- (Add Component Search) Type rigid
- Click Rigidbody
- (Inspector) Within Rigidbody – > Uncheck Use Gravity
- We just want our bullets to move in a straight line, if we used gravity they’d curve downwards – you can certainly play with this as an option in your XR experience 🙂

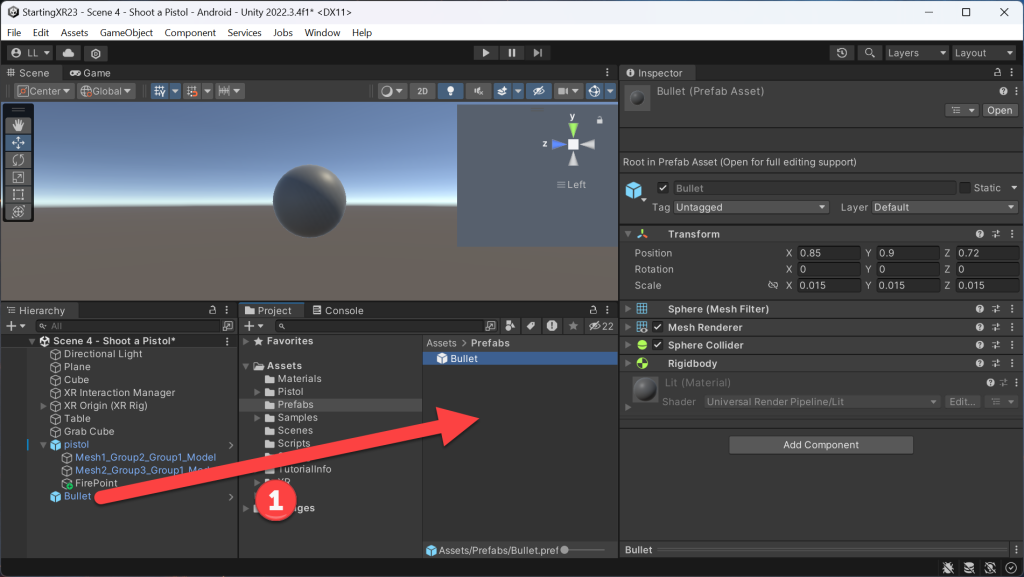
- Now that we have our Bullet configured, we need to make it a prefab so we can use some code to make lots of them!!!
- (Hierarchy) Click Bullet -> Drag it into our Prefabs folder
- Now let’s add some code!
- (Project) Right-Click on Assets folder
- Click Create
- Click Folder -> Rename it Scripts
- (Project) Within Scripts -> Right-Click
- Click Create
- Click C# Script -> Rename it Pistol

- (Project) Double-Click Pistol
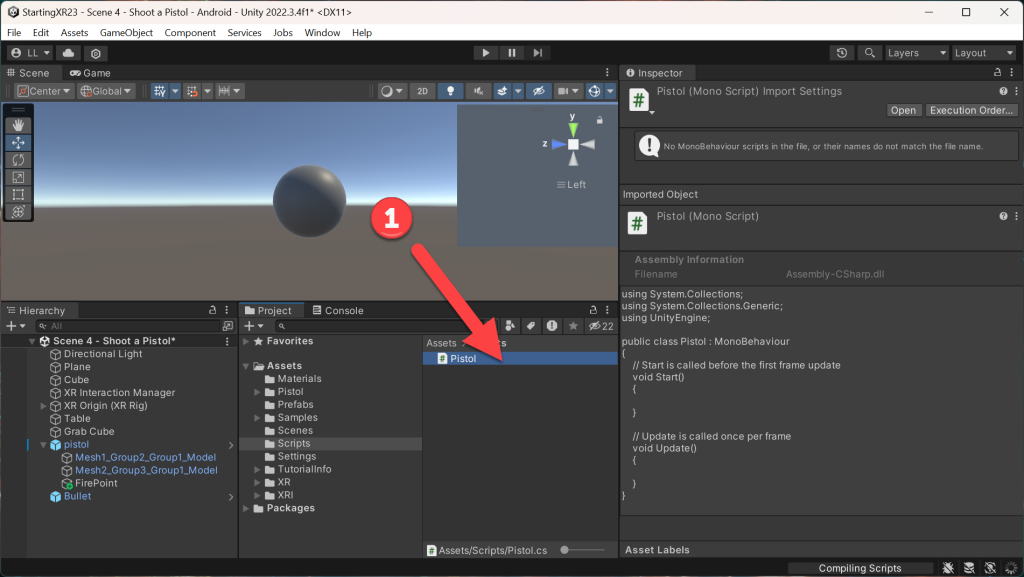
- (Visual Studio) You’ll see your initial empty script

- (Visual Studio) Update the code to the following… -> Click Save
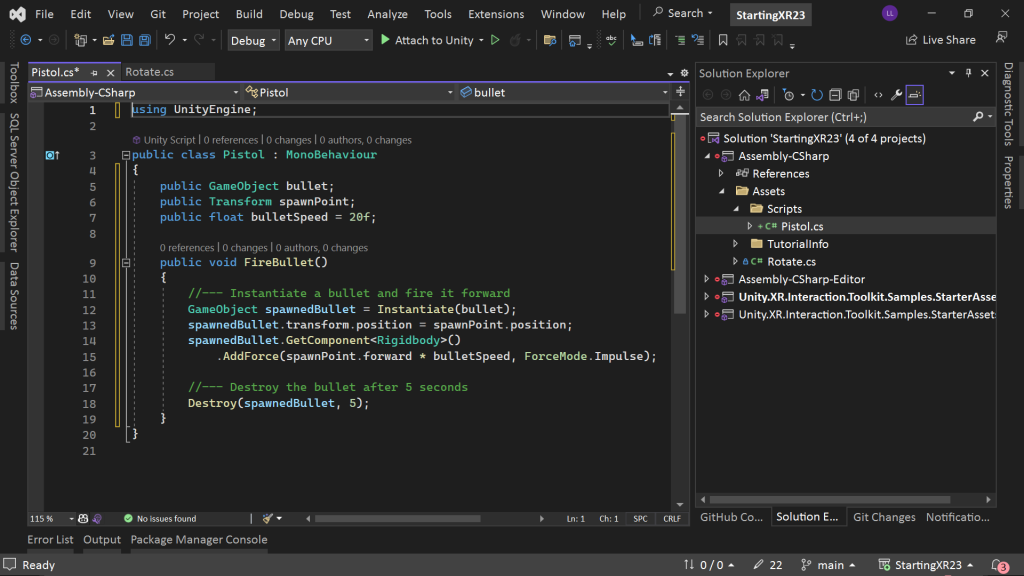
using UnityEngine;

public class Pistol : MonoBehaviour
{
    public GameObject bullet;
    public Transform spawnPoint;
    public float bulletSpeed = 20f;

    public void FireBullet()
    {
        //--- Instantiate a bullet and fire it forward
        GameObject spawnedBullet = Instantiate(bullet);
        spawnedBullet.transform.position = spawnPoint.position;
        spawnedBullet.GetComponent<Rigidbody>()
            .AddForce(spawnPoint.forward * bulletSpeed, ForceMode.Impulse);

        //--- Destroy the bullet after 5 seconds
        Destroy(spawnedBullet, 5);
    }
}- We are allowing the user to assign a bullet prefab — luckily we have one!
- We are allowing the user to pass in a spawn point — luckily we have our FirePoint!
- We are setting the speed — feel free to experiment and change this value
- Then in the FireBullet method…
- We’re creating an new bullet, which we call Instantiating it
- We’re setting it’s initial position to be our FirePoint
- We’re adding force to the bullet object so it comes firing out in a straight line
- Finally, we’re getting rid of the bullet, which we’re calling Destroy, after 5 seconds – as we don’t want a whole lot of bullets that we can’t even see anymore
- Last thing we need to do is to make the FireBullet method be called when the trigger is pulled on the controller
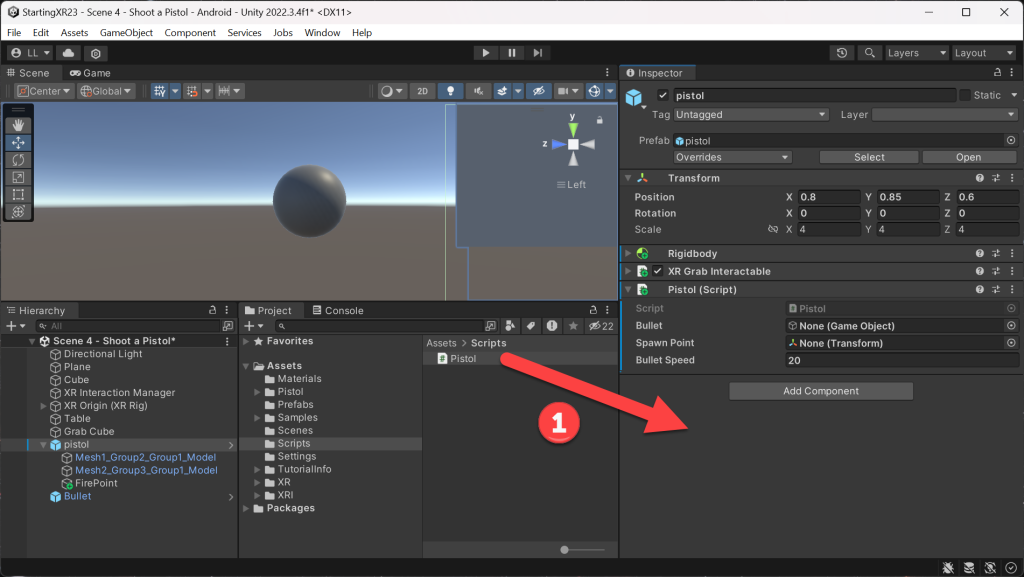
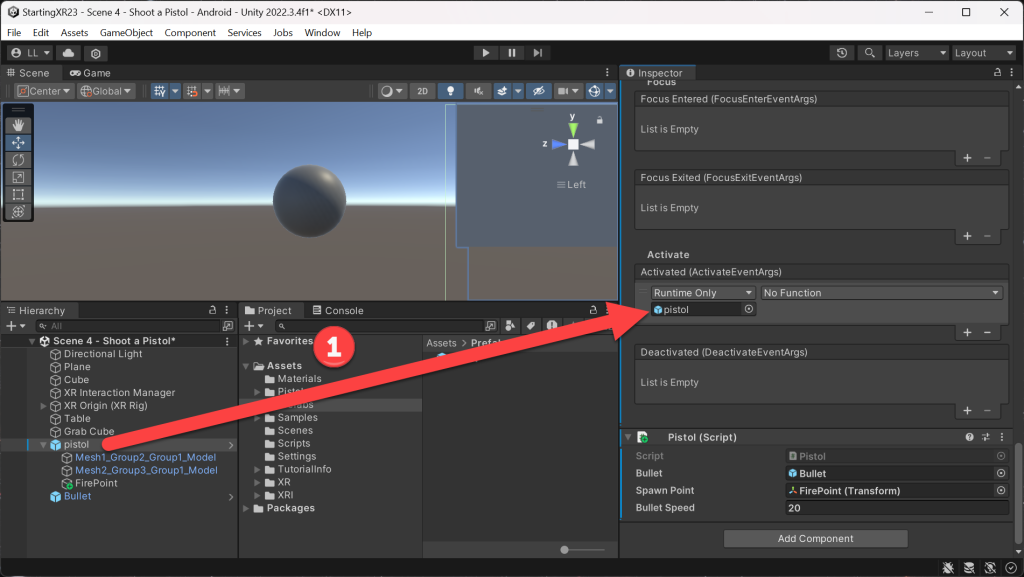
- (Project) Drag Pistol script onto the pistol object
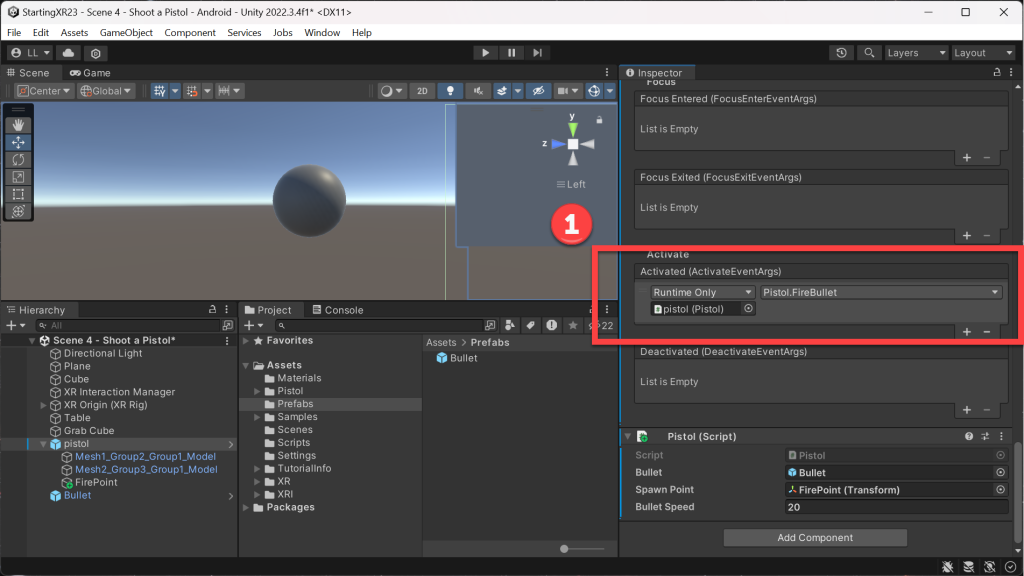
- You should see the Pistol (Script) as you can see in the picture below
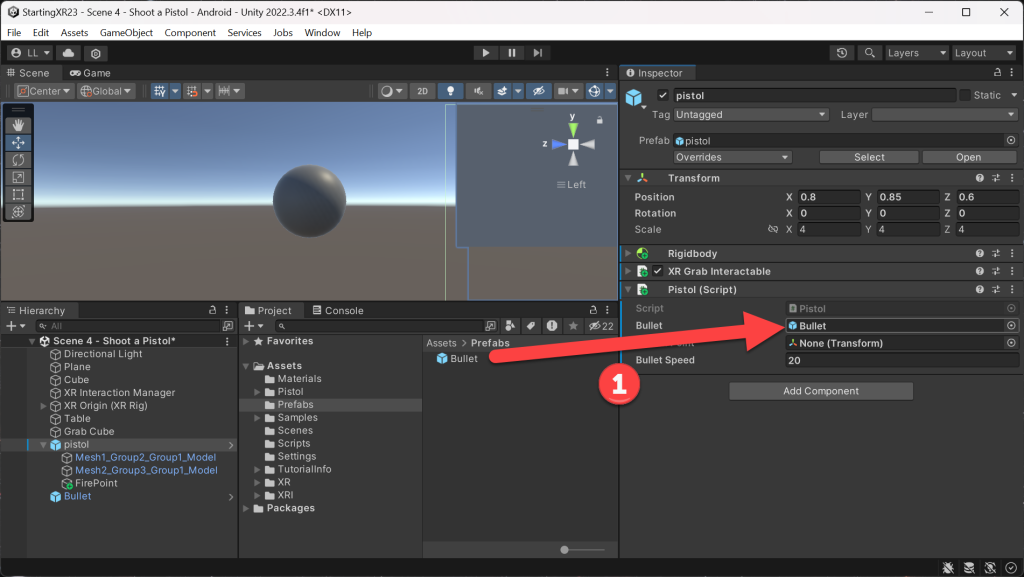
- (Project) Drag Bullet prefab onto Bullet field in the Pistol (Script)
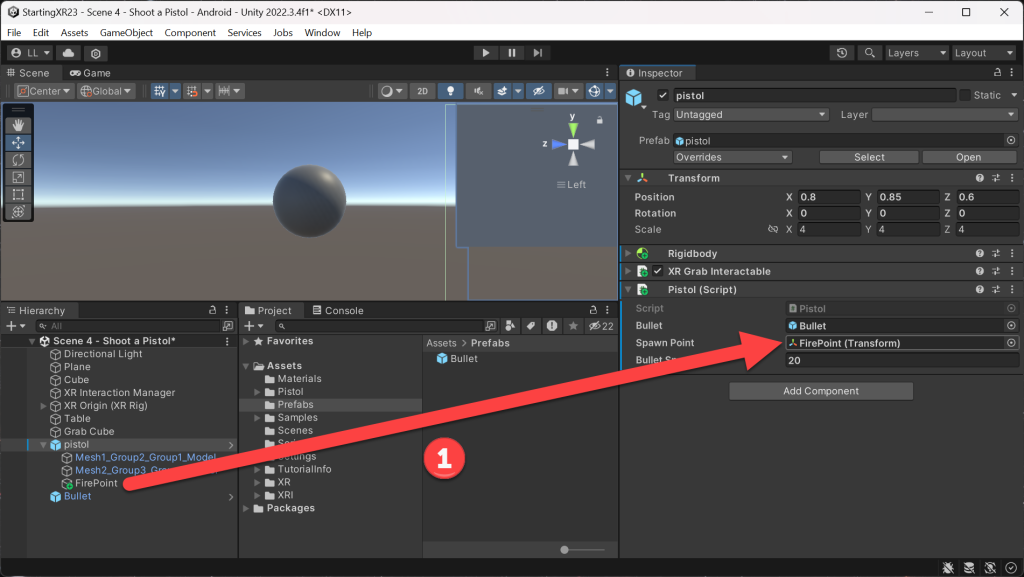
- (Project) Drag FirePoint object onto Spawn Point field in the Pistol (Script)
- (Inspector) Expand the XR Grab Interactable
- (Inspector) Within XR Grab Interactable -> Expand Interactable Events

- (Inspector) Within Interactable Events -> Click on the “+” icon under Activate
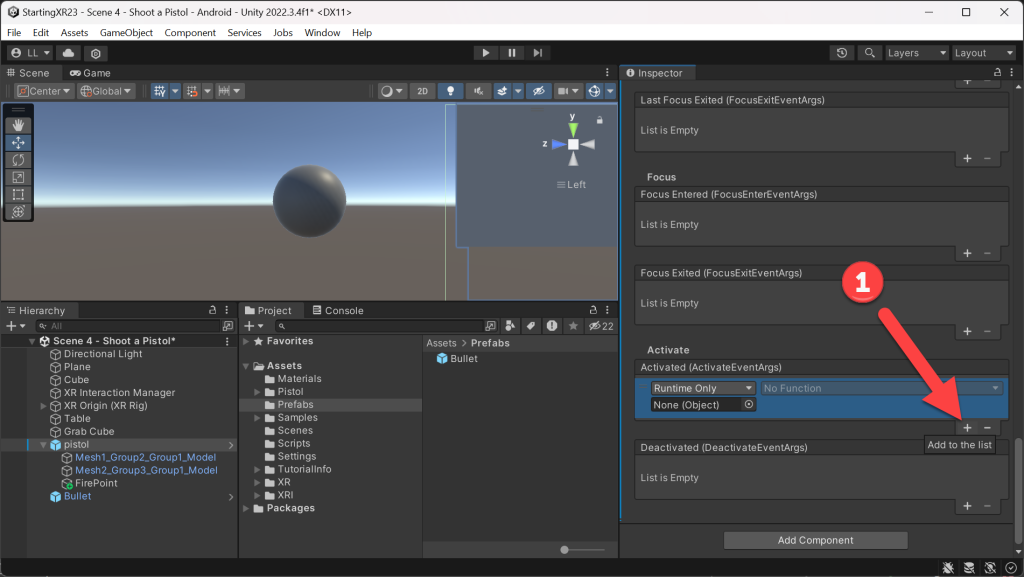
- (Hierarchy) Drag the pistol game object into the Object field under Activate
- (Inspector) Click dropdown arrow under Activate
- Click Pistol
- Click FireBullet()
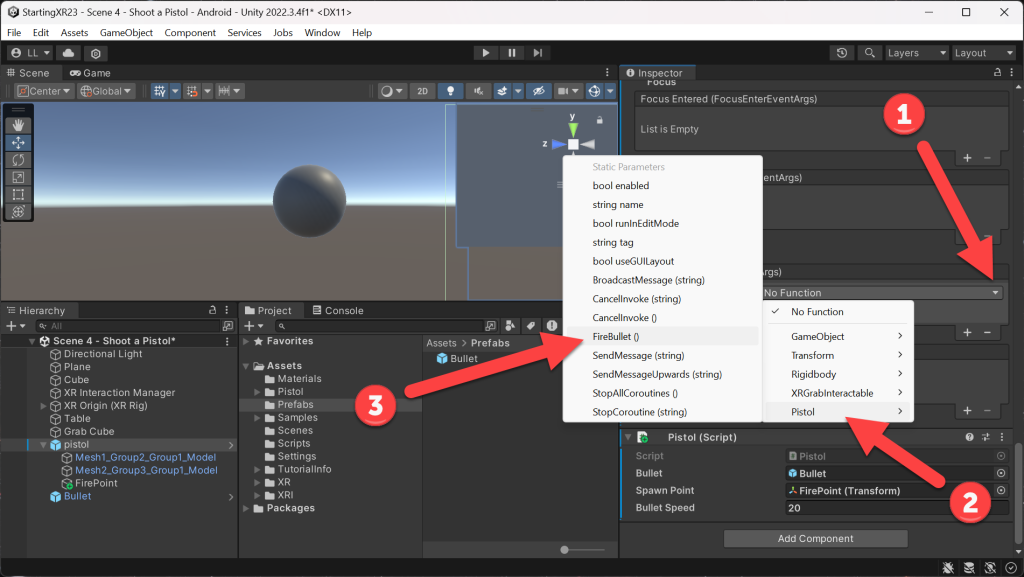
- This is what you should see… in a nutshell, when we click the trigger – it will run our Pistol.FireBullet method in our code
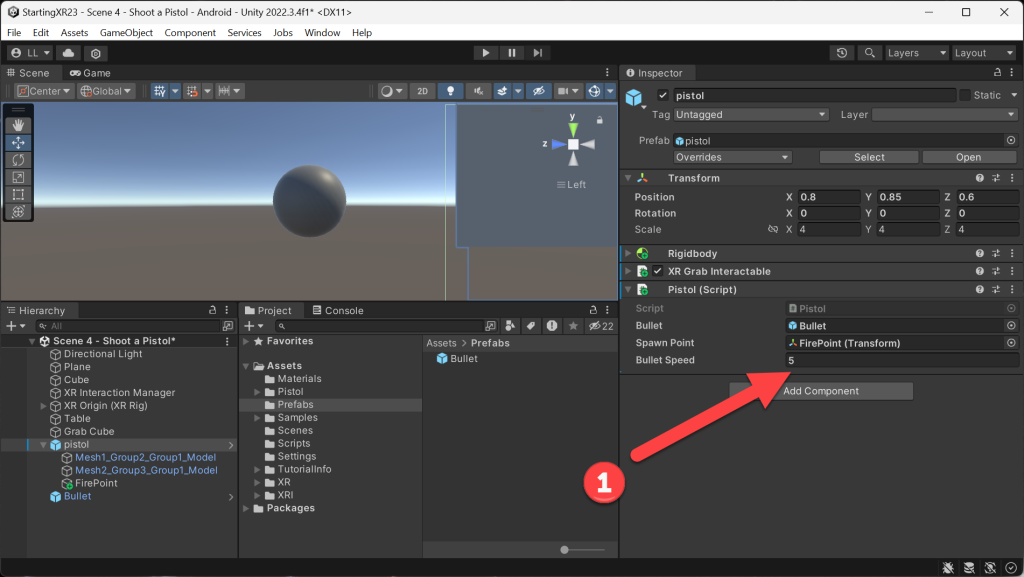
- (Inspector) Pistol (Script) -> I needed to reduce the Bullet Speed from 20 to 5 – but encourage you to play with that speed value to see what you like!
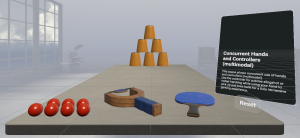
- Look at that! We can fire at objects in our scene — noting that the the Grab Cube moves as it has a Rigidbody on it — if you add Rigidbody to our floating cube, what do you think will happen?

I always love feedback and suggestions for new XR / AI blog posts!
Go build something amazing in XR & AI! — Lance 🙂
Check out other blog articles in this (and other) series!
Quick links to Lance’s latest XR Step-by-Step blog articles by device

One thought on “XR Step-by-Step 2023! Meta Quest: Shooting a Pistol! Unity 2022 + Open XR + XR Interaction Toolkit”