 Question: How many times have you been to a Developer presentation, or in a meeting and had the presenter not have their text large enough? Then when you ask them if they can make it larger… they struggled…
Solution: Windows Magnifier!
Magnifier is an existing feature that make it possible to quickly enlarge a section of your screen – easily making it possible to professionally show your audience what they need to see.
I stress to you to practice with this feature!
Last think you want to be doing is “learning” how to use it in front of a live audience.
Setting this up is quick and easy – but here are a couple hints / settings to make it even better…
 |
Windows Key + Plus Zooms in |
 |
Windows Key + Minus Zooms out |
 Open your Windows 10 Settings screen… click on Magnifier…
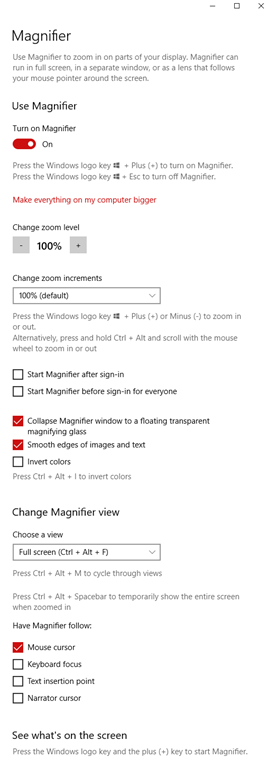
Here are my current default settings for Magnifier – for a full overview see the online docs.
Specifically turn ON – Collapse to magnifying glass icon. “Collapse the Magnifier toolbar to a magnifying glass icon. To show the Magnifier toolbar, select the magnifying glass icon.” Gets it out of your way.
For Choose Magnifier view, I’ve used both Full Screen and Lens for presentations.
For Change tracking options, keep it on Mouse Cursor – the other options don’t work terribly well IMO.
Also, Magnifier works great on a touch screen…
• To zoom in and out, tap on the plus (+) and minus (-) symbols on the corners of the screen.
• To move around the screen, drag along the borders of the screen in full screen view.
• To instantly zoom out and see where you are on the screen, tap with one finger on opposite borders of the screen simultaneously.
Make this a presentation tool that you use often…
Good coding!
